Hubbardton-forge 103049 User Manual
Browse online or download User Manual for Lighting Hubbardton-forge 103049. Hubbardton Forge 103049 User Manual
- Page / 2
- Table of contents
- BOOKMARKS
Summary of Contents
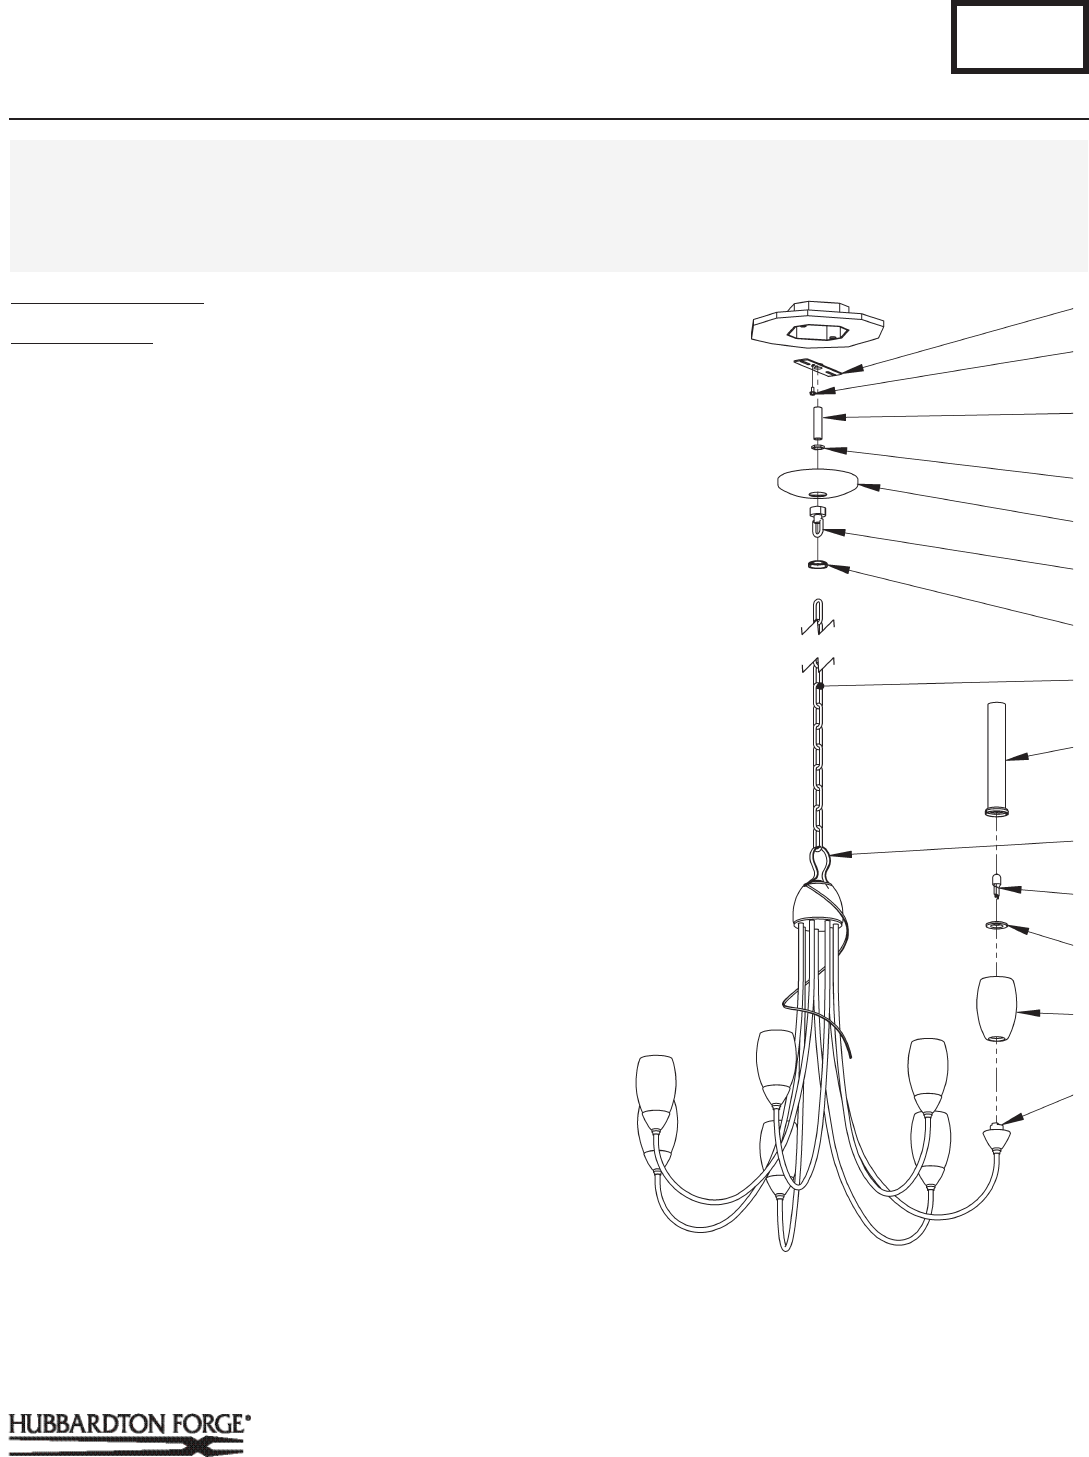
HUBBARDTONFORGE.COM-, - 154 RT. 30 SOUTH • CASTLETON, VERMONT 05735 All designs and images ©1989-2013 Hub
If you need further assistance, or nd that you are missing any parts, please contact the dealer from which you purchased this product. We hope you en
Related products and manuals for Lighting Hubbardton-forge 103049
 (2 pages)
© 2020, manymanuals.com. All rights reserved. | 1.257 s |
 Manymanuals.com
 Manymanuals.de
 Manymanuals.fr
 Manymanuals.it
 Manymanuals.pl
 Manymanuals.cz
 Manymanuals.es
 Manymanuals-pt.com
Comments to this Manuals