Hubbardton-forge 126403 User Manual
Browse online or download User Manual for Lighting Hubbardton-forge 126403. Hubbardton Forge 126403 User Manual
- Page / 2
- Table of contents
- BOOKMARKS
- 24454 1
Summary of Contents
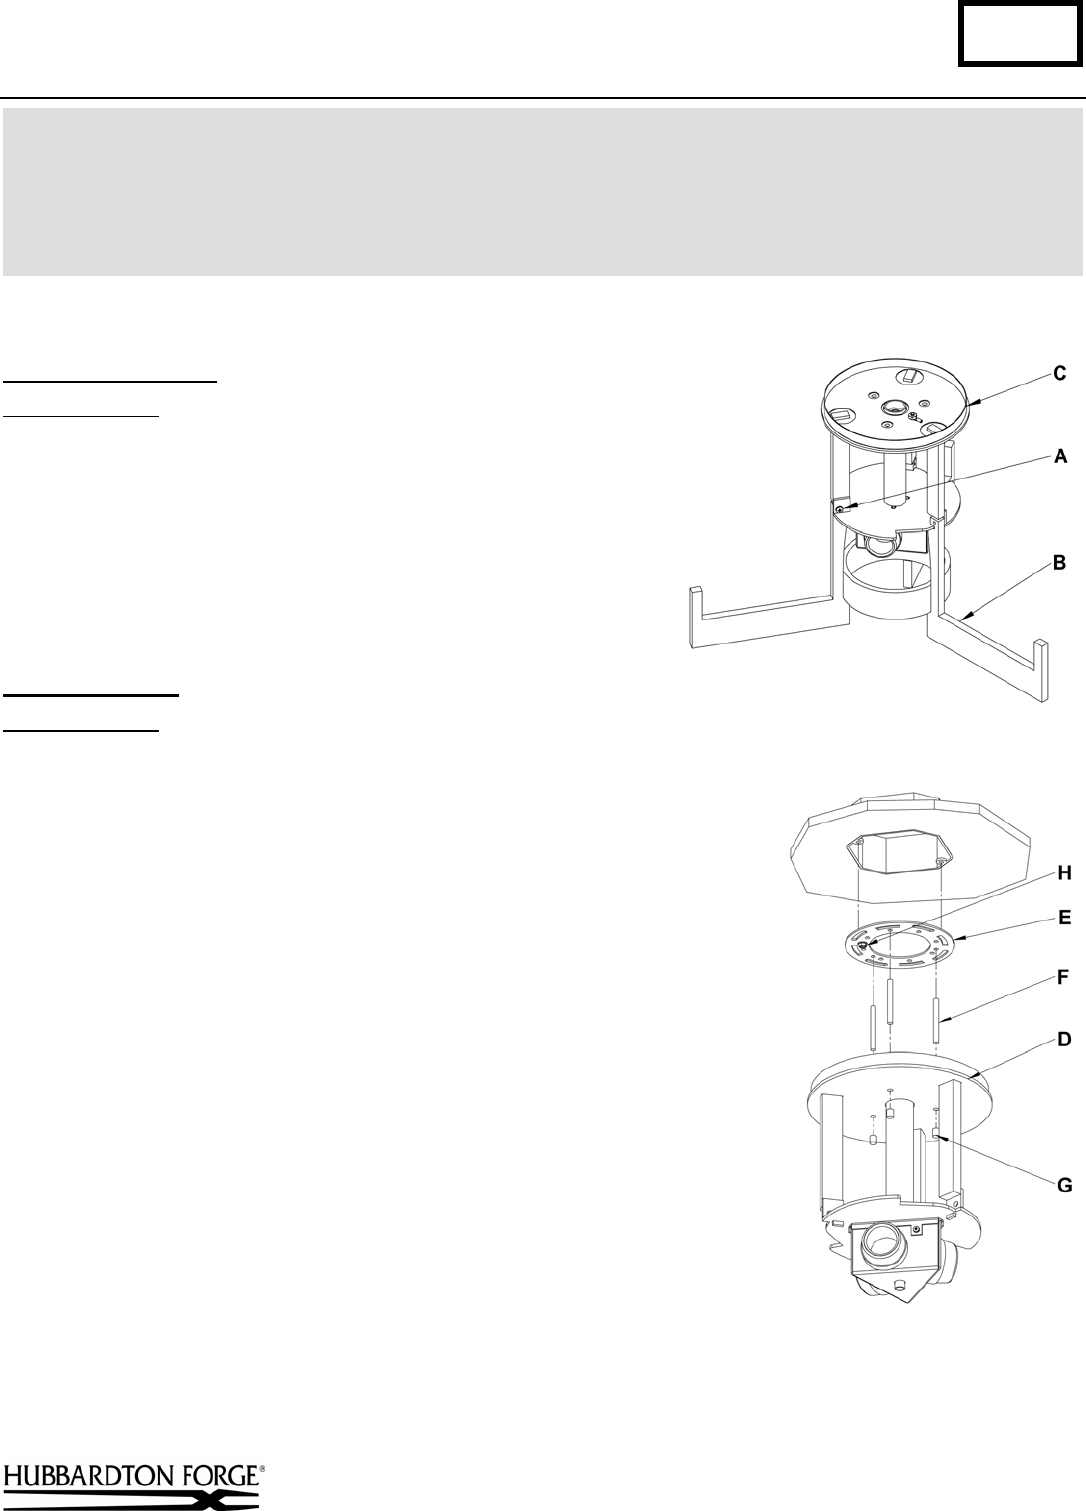
Installation Instructions A242 For Axis Medium Semi-Flush 12-6403 Page 1 of 2 Hand-Forged, Vermont-Made Lighting and Accessories P.O. Box 827, 1
Installation Instructions A242 For Axis Medium Semi-Flush 12-6403 Page 2 of 2 Hand-Forged, Vermont-Made Lighting and Accessories P.O. Box 827, 1
Related products and manuals for Lighting Hubbardton-forge 126403
 (3 pages)
© 2020, manymanuals.com. All rights reserved. | 5.078 s |
 Manymanuals.com
 Manymanuals.de
 Manymanuals.fr
 Manymanuals.it
 Manymanuals.pl
 Manymanuals.cz
 Manymanuals.es
 Manymanuals-pt.com
Comments to this Manuals